Click images for larger view
Introduction
The following describes how I installed UV Lamps in an Aurum 16 Inverter HVAC. Our A/C guy said he had never installed one on a mini-split before. Since the Mirage tech support guy said it was really easy to install, I figured I would give it a go.
WARNING! Product does not work while compressor on; and if you didn't have a professional install the product, you cannot return.
- After 1 week, the UV Lamps blank out while the compressor is running. These UV lamps are gas based, and maybe the Aurum 16 is just too powerful.
- The AC Outlet was actually really cool, at first. They (Noreen S.) sent me an RMA and replacement bulbs. Unfortunately, the issue occurred again.
- The warranty/returns gal (Noreen S.) left the company.
- Her replacement was a stickler for the "professional installation" bit.
- So was her boss.
- My experience with The AC Outlet went downhill from there.
- So my recommendation is to not follow the following installation instructions below, yourself; and maybe look into a different product altogether.
Installation Duration
It took me about 5 hours including preparation and cleanup. The biggest time drain was figuring out how to disassemble the HVAC device, i.e. taking the cover off, the grates, and the diffusers. I was extra careful because I didn't want to break anything.
Now that I have installed the UV lights successfully, I could probably do another system in about two hours.
What You Need
The HVAC Unit
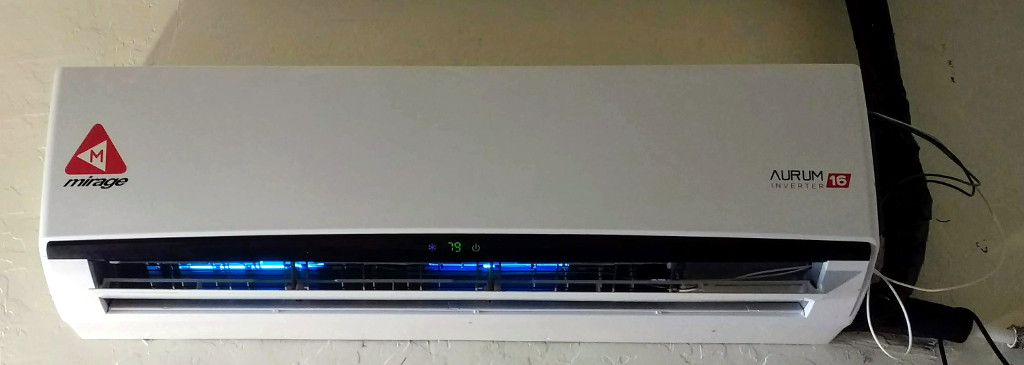
Mirage AURUM IAXH181A 18000 Btu/h 208/230V/1 Split Type Air Conditioner
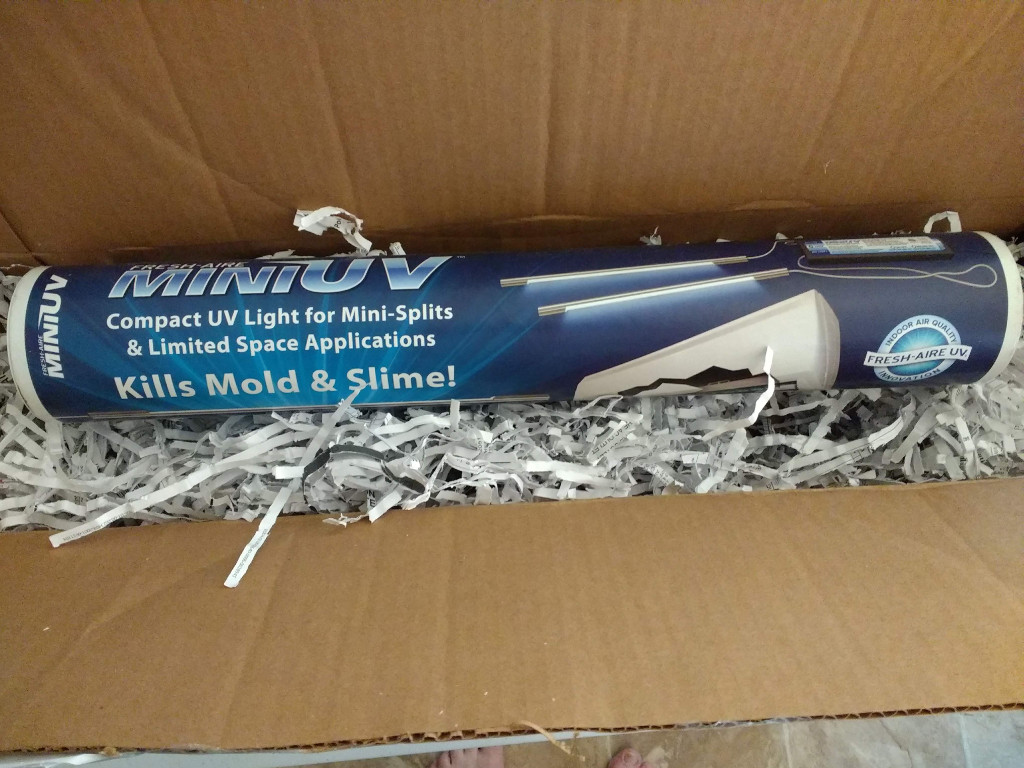
The UV Lamp Unit
The unit I installed is the Fresh-Aire TUV-MINI-D-230. I bought this online from TheACOutlet.com. (Note: See my warning in the introduction) My cost, after discounts, was $215.10. The unit came via FedEx, and took about a week to arrive. I had to sign to receive it.
Tools
- Phillips Screwdriver
- Flat Screwdriver—to use used as a light pry-bar
- Power Drill
- Neiko 10189A Step Drill Bit — I got this from Wal-Mart for $9.85 + tax. Amazon has it for the same price.
- Magnetic Pick-Up Tool—I think I got mine for really cheap at Harbor Freight Tools some years ago.
Miscellaneous Items
- Headlamp
- Antiseptic Wipes
- Fan
- Step Stool or some way to reach the unit
- Camera to document your progress
- Tunes
- Coffee
- VELCRO Brand - Sticky Back Hook and Loop Fasteners
Installation Steps
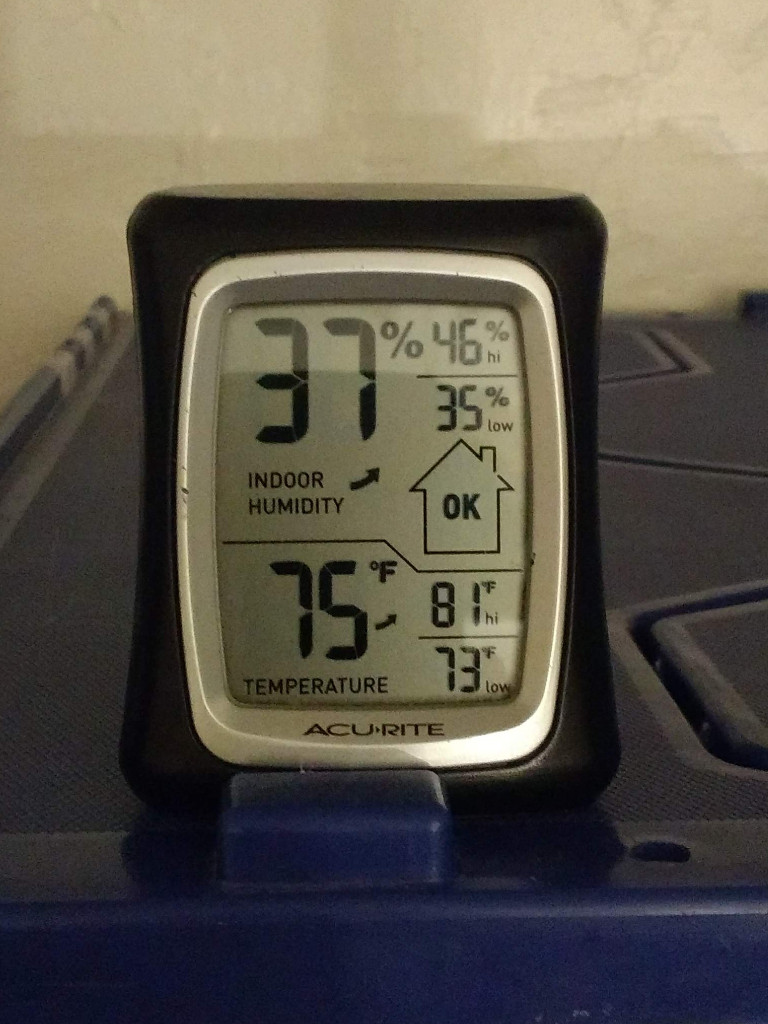
Cool the room I live in Phoenix, and I installed this 2018.08.02, during the hot, albeit not the hottest, season. To give you an idea, the low was 88°F, and today's high is supposed to be 110°F. So your first step is to cool the room and get up early. I started this project at 5:00 AM.
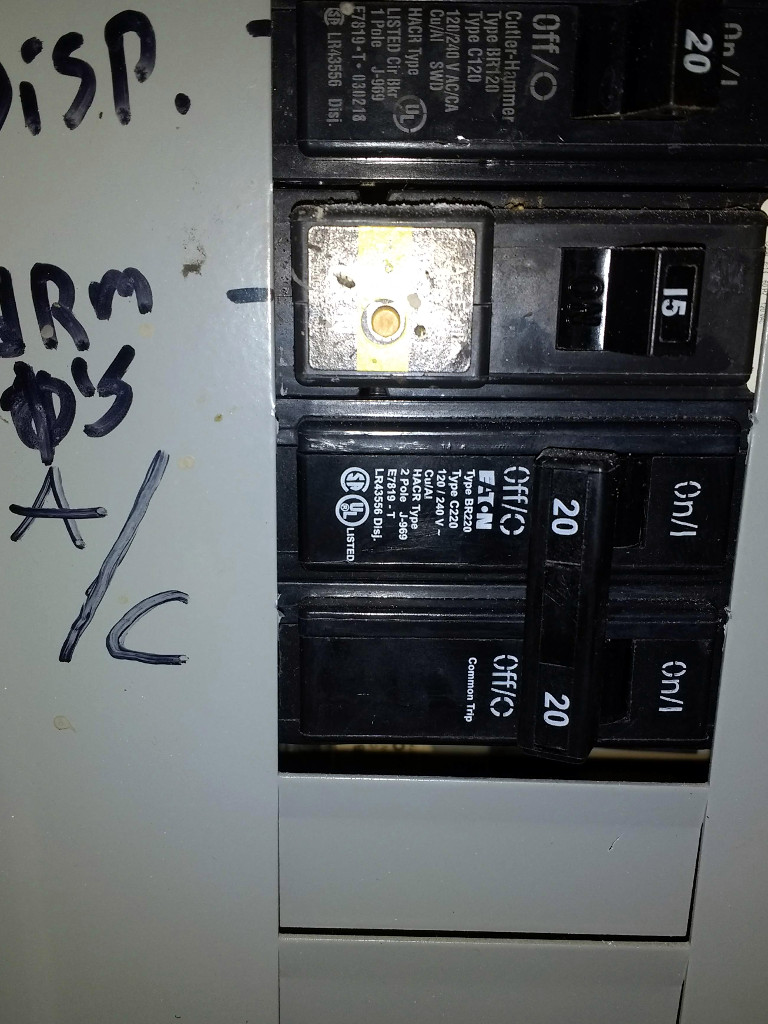
Turn circuit breakers off Goes without saying, but safety first!
Pop the auto-air guider out I did this later in the steps because I didn't realize it could be removed. My recommendation is to remove this as soon as possible. It's one of the easier pieces to remove: simply pop out the two white grommets at the center sections, then bend the plastic bar until the left-most side pops out of the hole. Note that the motor-side is fitted for the plastic piece, which makes sense if you think about it.
Take the cover off There are three screw on the lower part under little plastic flaps. You can move the flap easily with your thumbnail. I recommend using a magnetic pick-up tool to pull these screws out once they are unscrewed.
Open the lid to remove the four additional Phillips screws.
Pop the two plastic clips from either side. Pry lightly with a flat screwdriver.
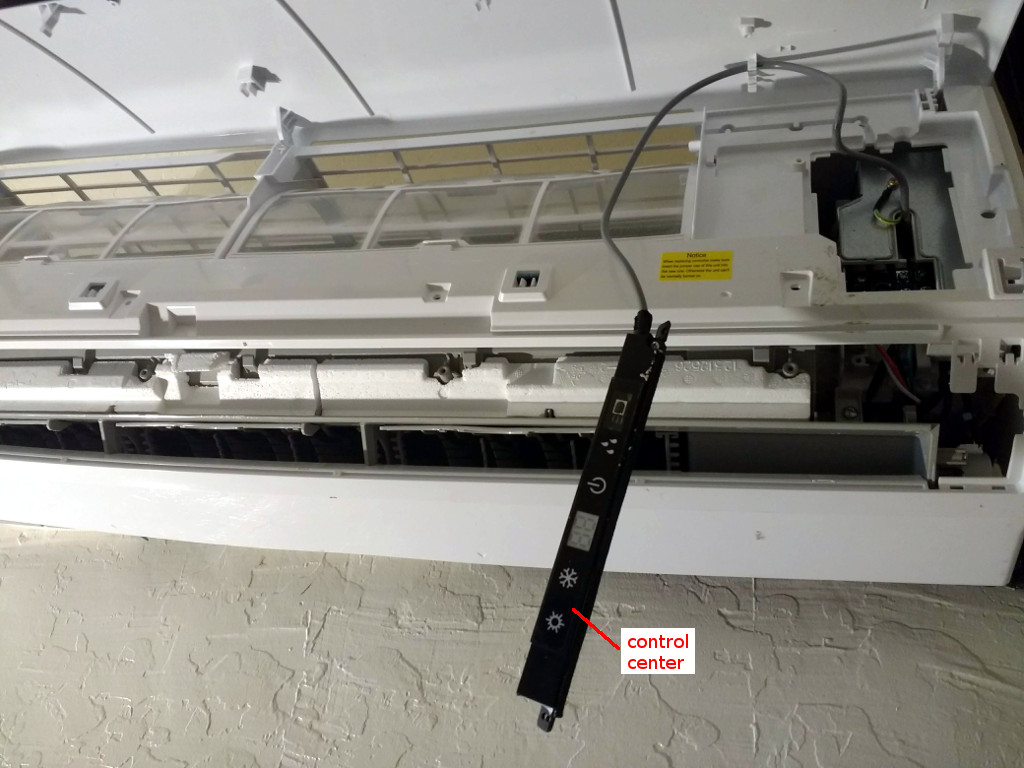
Unscrew the control center from the center of the unit within the black plastic bar. This will need to be fed out when you remove the plastic cover.
By this point, you should be able to pull the cover off. When I did so, it sounded as though the cover had some sort of light adhesive; it sounded like pulling tape from an object. This may have just been the rubbing against internal Styrofoam. With a bit of patience and a bit of contortion the cover will come off.

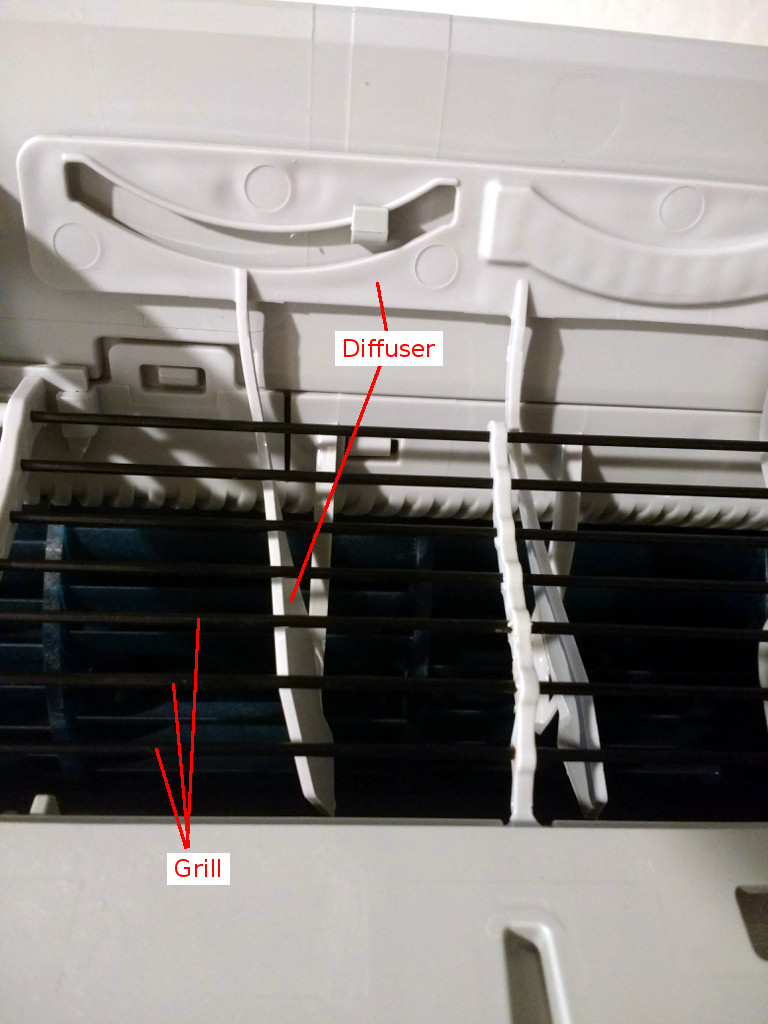
Remove the grills and diffusers The grills are tricky. You may need to use a flat screwdriver to pry a bit. The diffusers are straight forward once you figure the first one out.
Put the bulbs into the plastic clips Do this before pulling off the blue plastic adhesive backs. Luckily, I saw this tip in a video. Once the clips are affixed, there is no turning back, and there are only four included. Now place a bulb inside to get a sense of where they should go, where they should point, and how you can ensure maximum coverage of the fan.
Aim the bulbs Do this before affixing. There's no way to get your fingers in there to turn the bulb later. If you've already affixed the clips, you can always pop the bulb from the clips then reinsert it, but it's easier to line them up prior to affixing.
Finalize the bulbs Swab the area with an alcohol wipe. The one they send with the UV Lamps is tiny, so I used a regular sheet. Let the area dry, then stick down the bulb clips (with bulbs). Run the wires to the right.

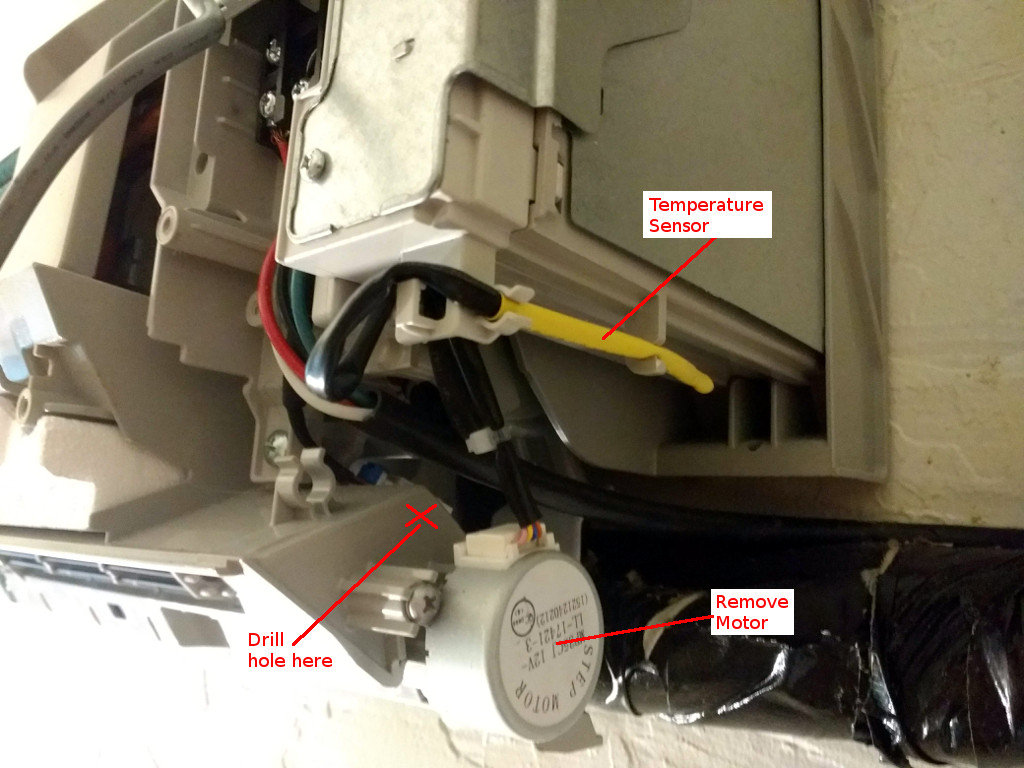
Drill the first big hole This hole needed to be big enough to pass through the plugs of the UV Lamps. Figuring out where to put the hole was tricky. As I mentioned, this unit is compact. I landed on a hole near the motor for the auto-air guider.
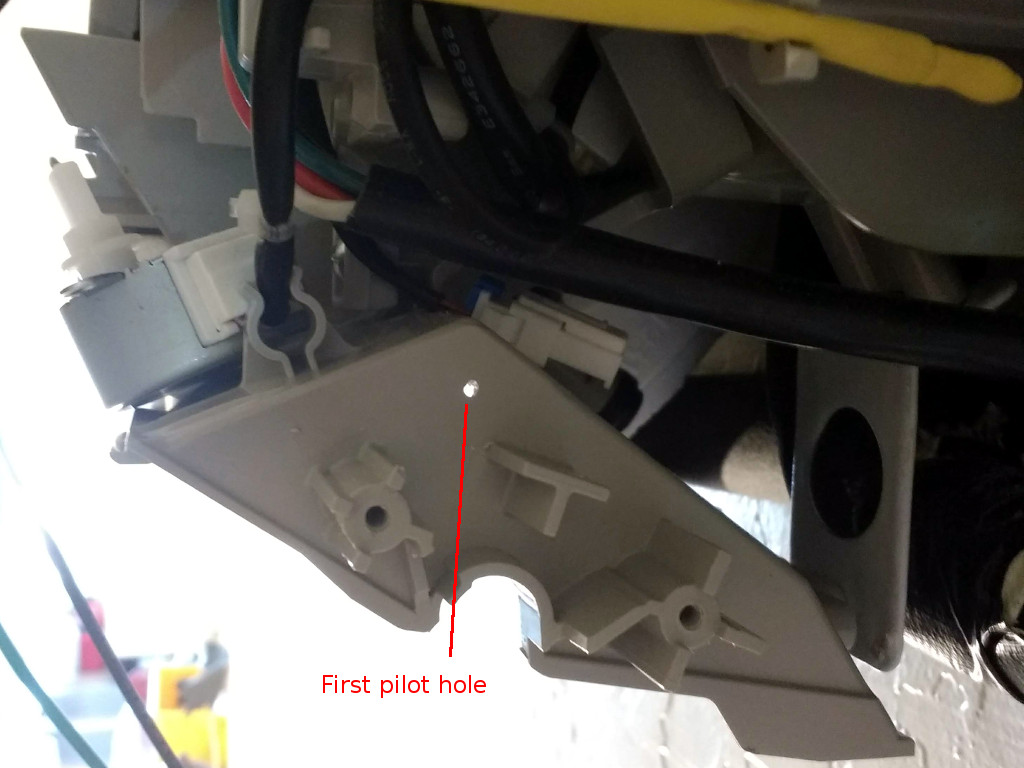
To drill the hole, I removed the motor for the auto-air guider by unfastening the two Phillips screws. I drilled three successive pilot holes to get a hole big enough for the Neiko Step Drill Bit. I think the first "step" is 7/16", which was adequate for the UV lamp plugs.
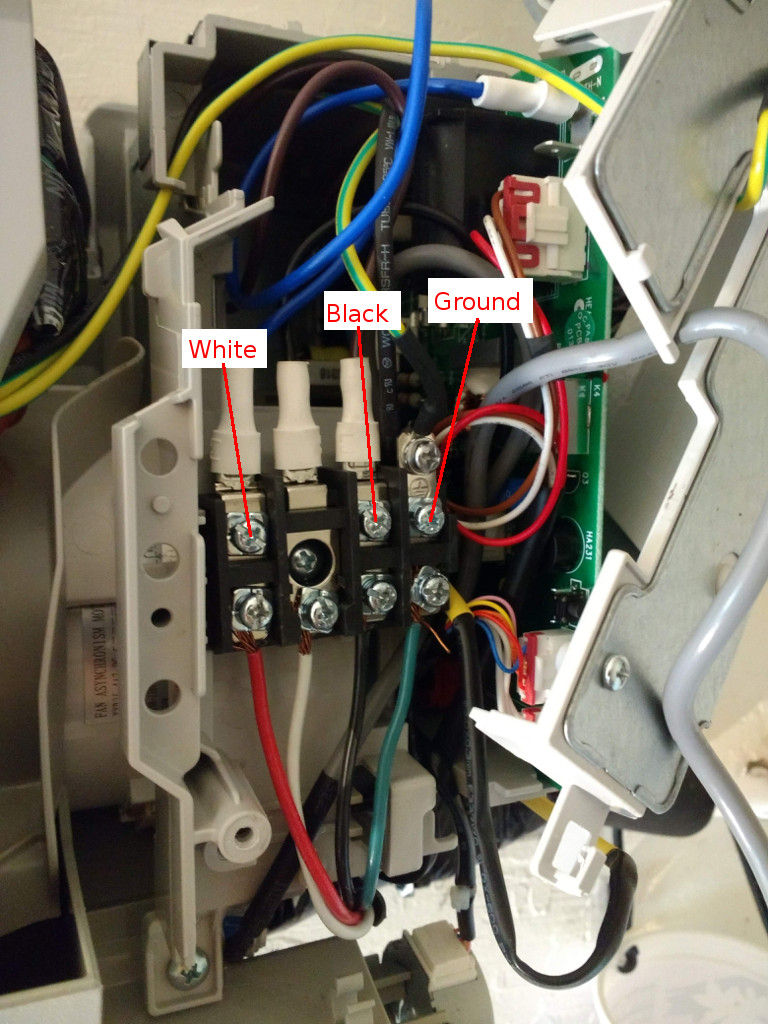
Wire it up There are three posts available for just this type of situation. The ground, green, is obvious. The other black and white were confusing because the original installer didn't use the color coding chart from within the cover. Since this is alternating current, it doesn't really matter. I made my best guess and moved on. I later confirmed with Mirage tech support that the wiring from the outside unit (original installer) could be on different posts that the sticker, and he said that was fine.
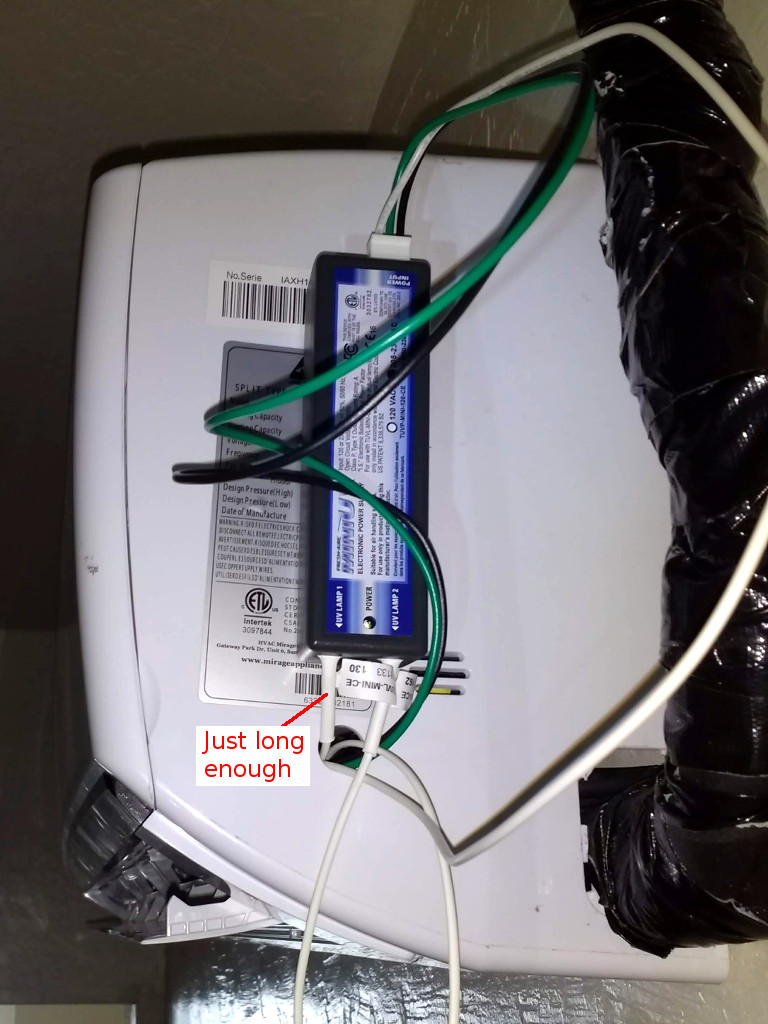
Drill another hole I realized the best place to put the electrical ballast was outside the unit. Thus, I drilled a hole in the cover along the same horizontal as the first hole. The electrical ballast plug is larger than the plugs to the lamps, so I needed a bigger hole. I went to the second or third step on the Neiko drill bit. So, somewhere between 1/2" and 9/16" diameter.
Reassemble the unit Put the cover back on while feeding wires through the appropriate places. Screw everything into place.
Mount the electrical ballast What I thought was double sticky-back adhesive from the UV Lamp kit was only sticky on one side, so I attempted to mount the electrical ballast onto the cover. Unfortunately, the screws they sent were too long. This part of the process could use some refinement. Had I to do it all over again, I would use double sided Velcro with sticky on each side.
Flip on the circuit breaker . . . and admire your handiwork.
Concluding Remarks
- Looking back, I would have placed the left-most lamp an inch further to the right, just to have a little more play with the length of the wire. The Aurum 16 is perhaps longer than the good folk at Fresh-Aire had considered.
- There is no room inside the HVAC unit to put the electrical ballast. Everything is compact and tight fitting in there.
- The UV Lamps stay on when the unit is turned off. To turn off the lamps you flip the circuit breakers. During the summer months in Phoenix, my A/C is on pretty much 24/7, and in the winter this unit will act as a heat pump and be on 24/7 also. However, there will be some months in which I will just flip the circuit breaker to maximize the life of these bulbs. They rate them for 1 year. I suspect this means 1 year of continuous use.
- The plastic wire connectors on the UV Lamps have a notch, so there is one right way to connect to the electrical ballast. That wasn't entirely obvious to me at first, and one kept popping out.
- If I did it again, I would have trimmed the length of the eletrical ballast power cord. I think I can do that without removing the cover, so I will probably do that some rainy day.
- In addition to the blue glow of reflected light, I have been noticing a reddish glow at the end of one of the bulbs. I contacted Fresh-Aire UV to see if this is normal.
- Bulbs are rated for a single year. Replacement bulbs, TUVL-MINI, aren't cheap. Poking around the Internet, I saw a price on one as low as $69.00. So, I will have to assess the efficacy of the unit vs. the cost in one year.
Post Installation Problems
I contacted Fresh-Aire UV on 2018.08.03 to find out what a reddish glow meant on the bulbs. On 2018.08.06, Dale Harrison replied back via E-mail. He said, “Sounds like you have lamps that may not have enough internal gas to fire up. Feel free to call me to discuss further.”
The bulbs looked fine on that day, so I E-mailed back saying that I would monitor and let him know.
On morning of 2018.08.08, I found the rightmost bulb had the reddish glow back, about 1/4 to 1/3 of the bulb. I took photos and sent to Dale Harrison. Later that morning, I called Dale. At that time, the rightmost bulb was completely out. He said I needed replacement bulbs from the distributor, who is theACOutlet.com.
The gal at The AC Outlet said the returns gal is named Noreen. So I waited to talk to Noreen.
I filled out the warranty request form she sent to me. The next day I called to see if she received it. She had. She said I would have to ship back the bad bulb, and when I knew the tracking number, she could ship me the new one.
I received a call back from someone else at theACOutlet.com who said they shipped the bulb, and that there would be a shipping label with it. I confirmed that this was different from what Noreen told me before. She said yes.
Questions? Comments?
You may ask any questions you like, and if I happen to know the answer, I will surely respond.
Contact Anthony Garot:
![]()
Copyright
This document is © 2018 Anthony J. Garot. Reproduction of this document, in whole or part, is strictly prohibited without prior written permission.
All product names, logos, and brands are property of their respective owners. All company, product and service names used in this website are for identification purposes only. Use of these names, logos, and brands does not imply endorsement.